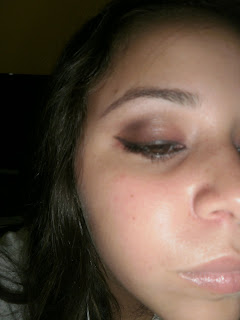
So last night, I was playing around with makeup and came up with this look.
It's a very intense plum look using my handy-dandy coastal scents 88 warm palette. I used mainly the bottom right side of the palette for the intense colors. The thing about these colors is that in their pans they look brown, but when I swatched them I realized they were gorgeous plum colors.
What I did to get this look

1) Applied this color on the inner third of my eye.

2) I applied this color on the outer two-thirds of my eye.
3)I applied this color inside my crease and blended it a bit in the outer v. I used windshield wiper motions to blend it out a bit and make it a little more smoked out. I wasn't going for a cut crease guys. :-)
4) Since these three colors are basically matte finishes. I took this gold from the 5th column and 4th row down to place on the center of my lid for a bit of a shimmer effect and to brighten my eyes. Place it lightly as we only want to add a shimmery effect.
5) Highlight time. I took this color and just applied it as a brow highlight. It has a pinky unde rtone and really compliments the look. From the left it is: 6th column and the first one.
 6) I applied this in between my crease and my highlight. So basically on the brow bone. This step is not necessary if you do not have lots of space between the eye and eyebrow. But thankfully I do, so it really makes the look so much prettier.

It's a very intense plum look using my handy-dandy coastal scents 88 warm palette. I used mainly the bottom right side of the palette for the intense colors. The thing about these colors is that in their pans they look brown, but when I swatched them I realized they were gorgeous plum colors.
What I did to get this look

1) Applied this color on the inner third of my eye.

2) I applied this color on the outer two-thirds of my eye.
3)I applied this color inside my crease and blended it a bit in
 the outer v. I used windshield wiper motions to blend it out a bit and make it a little more smoked out. I wasn't going for a cut crease guys. :-)
4) Since these
 three colors are basically matte finishes. I took this gold from the 5th column and 4th row down to place on the center of my lid for a bit of a shimmer effect and to brighten my eyes. Place it lightly as we only want to add a shimmery effect.
5) Highlight time. I took this color and just applied it as a brow highlight. It has a pinky unde
 rtone and really compliments the look. From the left it is: 6th column and the first one.
 6) I applied this in between my crease and my highlight. So basically on the brow bone. This step is not necessary if you do not have lots of space between the eye and eyebrow. But thankfully I do, so it really makes the look so much prettier.
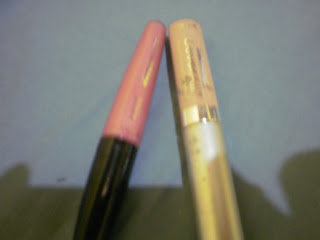
So that's all for the eyeshadow. Now on the lips I did a whole different step than usual. I wanted nude lips, but I don't actually own any nude lipsticks or glosses. I decided to be resourceful.

This is what I came up with. It is a pinky nude that is much lighter than my lips since my lips are pretty pigmented.
 1) I applied a wet and wild concealer, that i hate for undereye), all over my lips to mute them out.
2) I appliad a little bit of Avon Glazewear Shine in Darling Pink and that's it.
Pretty pinky nudey lips :-)

This is what I came up with. It is a pinky nude that is much lighter than my lips since my lips are pretty pigmented.
 1) I applied a wet and wild concealer, that i hate for undereye), all over my lips to mute them out.
2) I appliad a little bit of Avon Glazewear Shine in Darling Pink and that's it.
Pretty pinky nudey lips :-)
So that's all the steps for this look. Hope you guys enjoyed it and tried it out. Thanks so much for watching. Love ya.
Check out my youtube channel. Follow me on twitter. E-mail me @ beautybeginn er@yahoo.com
-Kisses
Check out my youtube channel. Follow me on twitter. E-mail me @ beautybeginn
 er@yahoo.com
-Kisses


No comments:
Post a Comment